Introduction to the UNIX shell
Overview
Teaching: 90 min
Exercises: 25 minQuestions
What is a command shell and why would I use one?
Where am I?
How can I see what files and directories I have?
How can I move around?
How can I read and search files?
How can I use loops and scripts to my advantage?
Objectives
Use the shell to navigate directories
Perform operations on files in directories outside your working directory
Interconvert between relative and absolute paths
View, search within, copy, move, and rename files. Create new directories.
Construct command pipelines with two or more stages.
Use for loops to run the same command for several input files.
Introduction to Unix commandline (BASH)
Learning objectives:
These introductory notes are adapted from The Carpentries Introduction to the Command Line for Genomics lessons
If you are not new to the UNIX shell, have a scroll through the lesson to ensure you know what is covered and then at the bottom is a link to some optional content that can be worked through while this lesson is being delivered.
Introducing the Shell
A shell is a computer program that presents a command line interface which allows you to control your computer using commands entered with a keyboard instead of controlling graphical user interfaces (GUIs) with a mouse/keyboard combination.
Many bioinformatics tools can only be used through a command line interface, or have extra capabilities in the command line version that are not available in the GUI. This is true, for example, of BLAST, which offers many advanced functions only accessible to users who know how to use a shell.
- The shell makes your work less boring. In bioinformatics you often need to do the same set of tasks with a large number of files. Learning the shell will allow you to automate those repetitive tasks and leave you free to do more exciting things.
- The shell makes your work less error-prone. When humans do the same thing a hundred different times (or even ten times), they’re likely to make a mistake. Your computer can do the same thing a thousand times with no mistakes.
- The shell makes your work more reproducible. When you carry out your work in the command-line (rather than a GUI), your computer keeps a record of every step that you’ve carried out, which you can use to re-do your work when you need to. It also gives you a way to communicate unambiguously what you’ve done, so that others can check your work or apply your process to new data.
- Many bioinformatic tasks require large amounts of computing power and can’t realistically be run on your own machine. These tasks are best performed using remote computers or cloud computing, which can only be accessed through a shell.
In this lesson you will learn how to use the command line interface to move around in your file system.
Open up a terminal in Juypter.
[ludovic.dutoit@wbl004 ~/] $
The dollar sign is a prompt, which shows us that the shell is waiting for input; your shell may use a different character as a prompt and may add information before the prompt. When typing commands, either from these lessons or from other sources, do not type the prompt, only the commands that follow it.
Let’s find out where we are by running a command called pwd
(which stands for “print working directory”).
At any moment, our current working directory
is our current default directory,
i.e.,
the directory that the computer assumes we want to run commands in,
unless we explicitly specify something else.
Here, the computer’s response is /home/yourname/,
name and the number you see will be different and relates to your username and the
specific Jupyter session running on NeSI.
pwd
/home/ludovic.dutoit/
Let’s look at how our file system is organized. We can see what files and subdirectories are in this directory by running ls,
which stands for “listing”:
ls
home nesi02659 nobackup_nesi02659
ls prints the names of the files and directories in the current directory in
alphabetical order,
arranged neatly into columns.
We can also add flags to our commands which will modify the behaviour of the command.
ls -l
total 3
lrwxrwxrwx 1 ludovic.dutoit ludovic.dutoit 19 Oct 18 21:02 home -> /home/ludovic.dutoit
lrwxrwxrwx 1 ludovic.dutoit ludovic.dutoit 23 Oct 22 21:02 obss_2022 -> /nesi/project/nesi02659/obss_2022/users/ludovic.dutoit/
The -> in this output tells us that we have some shortcut links in this directory.
homein this case is a short cut to our actualhomedirectoryobss_2022is a shortcut to our project on the nesi filesystem.
Full vs. Relative Paths
Directories can be specified using either a relative path or a full absolute path. The directories on the computer are arranged into a hierarchy. The full path tells you where a directory is in that hierarchy.
- A full path will always start with
/- also known as the root - A relative path is the path based on what you can see in your current directory
Here is an example of how the workshop directory hierarchy is set up:
/
|-- home/
  |-- ludovic.dutoit/
    |-- obss_2022/
      |-- intro_bash/
      |-- intro_r/
      `-- intro_bash/
Home
Your home directory is where your user account lives on the filesystem and is found at /home/yourname. Because your home directory special to you, it can also be referred to using ~/ which bash will automatically convert to the full path of /home/yourname.
Navigating Files and Directories
The command to change locations in our file system is cd, followed by a
directory name to change our working directory.
cd stands for “change directory”.
Lets use cd to navigate to our home directory using ~/ to represent our home.
cd ~
pwd
/home/ludovic.dutoit/
Using
cdwithout specifying a directory will by default send you to your home directory
This is the full name of your home directory. This tells you that you
are in a directory called ludovic.dutoit, which sits inside a directory called
home which sits inside the very top directory in the hierarchy. The
very top of the hierarchy is a directory called / which is usually
referred to as the root directory. So, to summarize: ludovic.dutoit is a
directory in home which is a directory in / (root).
Let’s look at what is in your home directory:
ls
obss_2022
obss_2022 is where we will be working out of for the entirity of the workshop. Lets change into that directory now using a relative path.
cd obss_2022
We can make the ls output from above, more comprehensible by using the flag -F,
which tells ls to add a trailing / to the names of directories:
ls -F
genomic_dna/ intro_bash/ intro_r/
Anything with a “/” after it is a directory. Things with a “*” after them are programs. If there are no decorations, it’s a file.
/home/ludovic.dutoit/obss_2022
We have a special command to tell the computer to move us back or up one directory level.
cd ..
pwd
You will see:
/home/yourname/
Now enter the following command:
cd obss_2022/intro_bash/shell_data/
This jumps forward multiple levels to the shell_data directory.
Now go back to the home directory with cd or cd ~
cd
You can also navigate to the shell_data directory using:
cd obss_2022/intro_bash/shell_data/untrimmed_fastq
These two commands have the same effect, they both take us to the shell_data directory.
The first uses the absolute path, giving the full address from the home directory. The
second uses a relative path, giving only the address from the working directory. A full
path always starts with a /. A relative path does not.
A relative path is like getting directions from someone on the street. They tell you to “go right at the stop sign, and then turn left on Main Street”. That works great if you’re standing there together, but not so well if you’re trying to tell someone how to get there from another country. A full path is like GPS coordinates. It tells you exactly where something is no matter where you are right now.
Examining Files
We now know how to switch directories, run programs, and look at the contents of directories, but how do we look at the contents of files?
One way to examine a file is to print out all of the
contents using the program cat.
Enter the following command from within the untrimmed_fastq directory:
cat SRR098026.fastq
This will print out all of the contents of the SRR098026.fastq to the screen.
Enter the following command:
less SRR097977.fastq
Some navigation commands in less:
| key | action |
|---|---|
| Space | to go forward |
| b | to go backward |
| g | to go to the beginning |
| G | to go to the end |
| q | to quit |
less also gives you a way of searching through files. Use the
“/” key to begin a search. Enter the word you would like
to search for and press enter. The screen will jump to the next location where
that word is found.
There’s another way that we can look at files, and in this case, just look at part of them. This can be particularly useful if we just want to see the beginning or end of the file, or see how it’s formatted.
The commands are head and tail and they let you look at
the beginning and end of a file, respectively.
head SRR098026.fastq
@SRR098026.1 HWUSI-EAS1599_1:2:1:0:968 length=35
NNNNNNNNNNNNNNNNCNNNNNNNNNNNNNNNNNN
+SRR098026.1 HWUSI-EAS1599_1:2:1:0:968 length=35
!!!!!!!!!!!!!!!!#!!!!!!!!!!!!!!!!!!
@SRR098026.2 HWUSI-EAS1599_1:2:1:0:312 length=35
NNNNNNNNNNNNNNNNANNNNNNNNNNNNNNNNNN
+SRR098026.2 HWUSI-EAS1599_1:2:1:0:312 length=35
!!!!!!!!!!!!!!!!#!!!!!!!!!!!!!!!!!!
@SRR098026.3 HWUSI-EAS1599_1:2:1:0:570 length=35
NNNNNNNNNNNNNNNNANNNNNNNNNNNNNNNNNN
tail SRR098026.fastq
+SRR098026.247 HWUSI-EAS1599_1:2:1:2:1311 length=35
#!##!#################!!!!!!!######
@SRR098026.248 HWUSI-EAS1599_1:2:1:2:118 length=35
GNTGNGGTCATCATACGCGCCCNNNNNNNGGCATG
+SRR098026.248 HWUSI-EAS1599_1:2:1:2:118 length=35
B!;?!A=5922:##########!!!!!!!######
@SRR098026.249 HWUSI-EAS1599_1:2:1:2:1057 length=35
CNCTNTATGCGTACGGCAGTGANNNNNNNGGAGAT
+SRR098026.249 HWUSI-EAS1599_1:2:1:2:1057 length=35
A!@B!BBB@ABAB#########!!!!!!!######
The -n option to either of these commands can be used to print the
first or last n lines of a file.
head -n 1 SRR098026.fastq
@SRR098026.1 HWUSI-EAS1599_1:2:1:0:968 length=35
tail -n 1 SRR098026.fastq
A!@B!BBB@ABAB#########!!!!!!!######
Shortcut: Tab Completion
Typing out file or directory names can waste a lot of time and it’s easy to make typing mistakes. Instead we can use tab complete as a shortcut. When you start typing out the name of a directory or file, then hit the Tab key, the shell will try to fill in the rest of the directory or file name.
Return to the intro_bash directory:
cd ~/obss_2022/intro_bash
then enter:
cd she<tab>
The shell will fill in the rest of the directory name for
shell_data.
Now change directories to untrimmed_fastq in shell_data
cd shell_data
cd untrimmed_fastq
Using tab complete can be very helpful. However, it will only autocomplete a file or directory name if you’ve typed enough characters to provide a unique identifier for the file or directory you are trying to access.
For example, if we now try to list the files which names start with SR
by using tab complete:
ls SR<tab>
The shell auto-completes your command to SRR09, because all file names in
the directory begin with this prefix. When you hit
Tab again, the shell will list the possible choices.
ls SRR09<tab><tab>
SRR097977.fastq SRR098026.fastq
Tab completion can also fill in the names of programs, which can be useful if you remember the beginning of a program name.
Copying Files
When working with computational data, it’s important to keep a safe copy of that data that can’t be accidentally overwritten or deleted. For this lesson, our raw data is our FASTQ files. We don’t want to accidentally change the original files, so we’ll make a copy of them and change the file permissions so that we can read from, but not write to, the files.
First, let’s make a copy of one of our FASTQ files using the cp command.
Navigate to the shell_data/untrimmed_fastq directory and enter:
cp SRR098026.fastq SRR098026-copy.fastq
ls -F
SRR097977.fastq SRR098026-copy.fastq SRR098026.fastq
Creating Directories
The mkdir command is used to make a directory. Enter mkdir
followed by a space, then the directory name you want to create:
mkdir backup
Moving
We can now move our backup file to this directory. We can
move files around using the command mv:
mv SRR098026-copy.fastq backup/
ls backup
SRR098026-copy.fastq
The mv command is also how you rename files. Let’s rename this file to make it clear that this is a backup:
cd backup
mv SRR098026-copy.fastq SRR098026-backup.fastq
ls
SRR098026-backup.fastq
Redirection/Pipes
We discussed in a previous section how to look at a file using less and head. We can also
search within files without even opening them, using grep. We can then send what we find to somewhere else.
cd ~/obss_2022/intro_bash/shell_data/untrimmed_fastq
Suppose we want to see how many reads in our file have really bad segments containing 10 consecutive unknown nucleotides (Ns). Let’s search for the string NNNNNNNNNN in the SRR098026 file:
grep NNNNNNNNNN SRR098026.fastq
One of the sets of lines returned by this command is: CNNNNNNNNNNNNNNNNNNNNNNNNNNNNNNNNNN.
Because a read in a Fastq file involves 4 lines per read, we want a way to return the metadata and the quality associated with that sequence.
FastQ files
We will cover the FastQ format in more depth as part of the Genomic DNA variant calling lesson tomorrow.
@SRR098026.177 HWUSI-EAS1599_1:2:1:1:2025 length=35
CNNNNNNNNNNNNNNNNNNNNNNNNNNNNNNNNNN
+SRR098026.177 HWUSI-EAS1599_1:2:1:1:2025 length=35
#!!!!!!!!!!!!!!!!!!!!!!!!!!!!!!!!!!
We can use the -B argument for grep to return a specific number of lines before
each match. The -A argument returns a specific number of lines after each matching line. Here we want the line before and the two lines after each
matching line, so we add -B1 -A2 to our grep command:
grep -B1 -A2 NNNNNNNNNN SRR098026.fastq
Instead of the found text spilling onto the screen, it would be useful to be able to send it to a file so that we could browse through it in a controlled manner e.g. using less.
The command for redirecting output to a file is >.
Let’s try out this command and copy all the records (including all four lines of each record)
in our FASTQ files that contain
‘NNNNNNNNNN’ to another file called bad_reads.txt.
grep -B1 -A2 NNNNNNNNNN SRR098026.fastq > bad_reads.txt
The UNIX shell comes with many useful programs, once such one is wc which does a word count on a file.
We can then check how many lines we have.
wc -l bad_reads.txt
Help and Manuals
You can find out what flags are available to most UNIX programs by using the
--helpflag. Or you can use the in-built manual by usingman <program>, e.g.man wcwill let you find out what the-lflag does.
537 bad_reads.txt
Wait, but that is not a multiple of four? Let’s have a look at this file with ‘less’
less bad_reads.txt
use :q to leave. grep added a little -- in between. We can count the number of reads because every read start with an ID, starting with the symbol @. We can use grep to count the number of @, using the “-c” for count parameter.
grep -c @ bad_reads.txt
134
We created the files to store the reads and then counted the bad reads using two different grep commands to see how many reads matched our criteria. There’s a way to do this, however, that
doesn’t require us to create these intermediate files - the pipe command (|).
This is probably not a key on
your keyboard you use very much, so let’s all take a minute to find that key. For the standard QWERTY keyboard
layout, the | character can be found using the key combination
- Shift+\
What | does is take the output that is scrolling by on the terminal and uses that output as input to another command.
When our output was scrolling by, we might have wished we could slow it down and
look at it, like we can with less. Well it turns out that we can! We can redirect our output
from our grep call through the less command.
grep -B1 -A2 NNNNNNNNNN SRR098026.fastq | wc -l
Variables
A variable is a method to store information eg a list, and use it again (or several times) without having to write the list out.
foo=abc
echo foo is $foo
foo is abc
Writing for loops
Loops are key to productivity improvements through automation as they allow us to execute commands repeatedly. Similar to wildcards and tab completion, using loops also reduces the amount of typing (and typing mistakes). Loops are helpful when performing operations on groups of sequencing files, such as unzipping or trimming multiple files. We will use loops for these purposes in subsequent analyses, but will cover the basics of them for now.
When the shell sees the keyword for, it knows to repeat a command (or group of commands) once for each item in a list.
Each time the loop runs (called an iteration), an item in the list is assigned in sequence to the variable, and
the commands inside the loop are executed, before moving on to the next item in the list. Inside the loop, we call for
the variable’s value by putting $ in front of it. The $ tells the shell interpreter to treat the variable
as a variable name and substitute its value in its place, rather than treat it as text or an external command.
cd ../untrimmed_fastq/
for thing in list_of_things
do
    operation_using $thing    # Indentation within the loop is not required, but aids legibility
done
for fruit in banana lemon orange
do
    echo $fruit
done
banana
lemon
orange
In that example, fruit becomes each thing in the lit in order. First, it becomes banana, the loop is ran and banana is printed. Then fruit becomes lemon, the loop is run and lemon is printed. Finally, the same happen with orange. After orange, the loop has exhausted the loop and the command is over.
We ran a loop over a list of fruits using a variable called fruit. That makes perfect sense But the variable is arbitrary, it does not have to make sense.
for friend in zucchini gecko kowhai
do
echo $friend
done
zucchini
gecko
kowhai
Let’s write a more useful for loop to show us the first two lines of the fastq files we downloaded earlier. You will notice the shell prompt changes from $ to > and back again as we were typing in our loop. The second prompt, >, is different to remind us that we haven’t finished typing a complete command yet. A semicolon, ;, can be used to separate two commands written on a single line.
for filename in SRR097977.fastq SRR098026.fastq
do
    echo $filename
    head -n 2 ${filename}
done
The for loop begins with the formula for <variable> in <group to iterate over>. In this case, the word filename is designated
as the variable to be used over each iteration. In our case SRR097977.fastq and SRR098026.fastq will be substituted for filename
because they fit the pattern of ending with .fastq in the directory we’ve specified. The next line of the for loop is do. The next line is
the code that we want to execute. We are telling the loop to print the first two lines of each variable we iterate over. Finally, the
word done ends the loop.
After executing the loop, you should see each filename and then the first two lines of both fastq files printed to the terminal. Let’s now create a loop that will save this information to a file. Note that we are using >> to append the text to our seq_info.txt file. If we used >, the seq_info.txt file would be rewritten every time the loop iterates, so it would only have text from the last variable used. Instead, >> adds to the end of the file.
for filename in SRR097977.fastq SRR098026.fastq
do
    echo $filename
    head -n 2 ${filename} >> seq_info.txt
done
Loops are power! You can repeat them with complex operations over thousands of files, but typing the thousands of files into your list of things in the pain. Here comes *, the wildcard. Instead of typing each fastq file name, we will use the wildcard symbol. That little star means everything. Let’s try it our simplest loop, just printing file names.
for filename in SRR097977.fastq SRR098026.fastq
do
    echo $filename
done
When writing a loop, you will not be able to return to previous lines once you have pressed Enter. Remember that we can cancel the current command using
- Ctrl+C
If you notice a mistake that is going to prevent your loop for executing correctly.
Extended for loops
basename is a function in UNIX that is helpful for removing a uniform part of a name from a list of files. In this case, we will use basename to remove the .fastq extension from the files that we’ve been working with.
basename SRR097977.fastq .fastq
We see that this returns just the SRR accession, and no longer has the .fastq file extension on it.
SRR097977
If we try the same thing but use .fasta as the file extension instead, nothing happens. This is because basename only works when it exactly matches a string in the file.
basename SRR097977.fastq .fasta
SRR097977.fastq
Basename is really powerful when used in a for loop. It allows to access just the file prefix, which you can use to name things. Let’s try this.
Inside our for loop, we create a new name variable. We call the basename function inside the parenthesis, then give our variable name from the for loop, in this case ${filename}, and finally state that .fastq should be removed from the file name. It’s important to note that we’re not changing the actual files, we’re creating a new variable called name. The line > echo $name will print to the terminal the variable name each time the for loop runs. Because we are iterating over two files, we expect to see two lines of output.
for filename in *.fastq
> do
> name=$(basename ${filename} .fastq)
> echo ${name}
> done
One way this is really useful is to move files. Let’s rename all of our .txt files using mv so that they have the years on them, which will document when we created them.
for filename in *.txt
> do
> name=$(basename ${filename} .txt)
> mv ${filename}  ${name}_2019.txt
> done
Extra exercises
Writing files
We’ve been able to do a lot of work with files that already exist, but what if we want to write our own files? We’re not going to type in a FASTA file, but we’ll see as we go through other tutorials, there are a lot of reasons we’ll want to write a file, or edit an existing file.
To add text to files, we’re going to use a text editor called Nano. We’re going to create a file to take notes about what we’ve been doing with the data files in ~/obss_2022/intro_bash/shell_data/untrimmed_fastq.
This is good practice when working in bioinformatics. We can create a file called README.txt that describes the data files in the directory or documents how the files in that directory were generated. As the name suggests, it’s a file that we or others should read to understand the information in that directory.
Let’s change our working directory to ~/obss_2022/intro_bash/shell_data/untrimmed_fastq using cd,
then run nano to create a file called README.txt:
cd ~/shell_data/untrimmed_fastq
nano README.txt
You should see something like this:
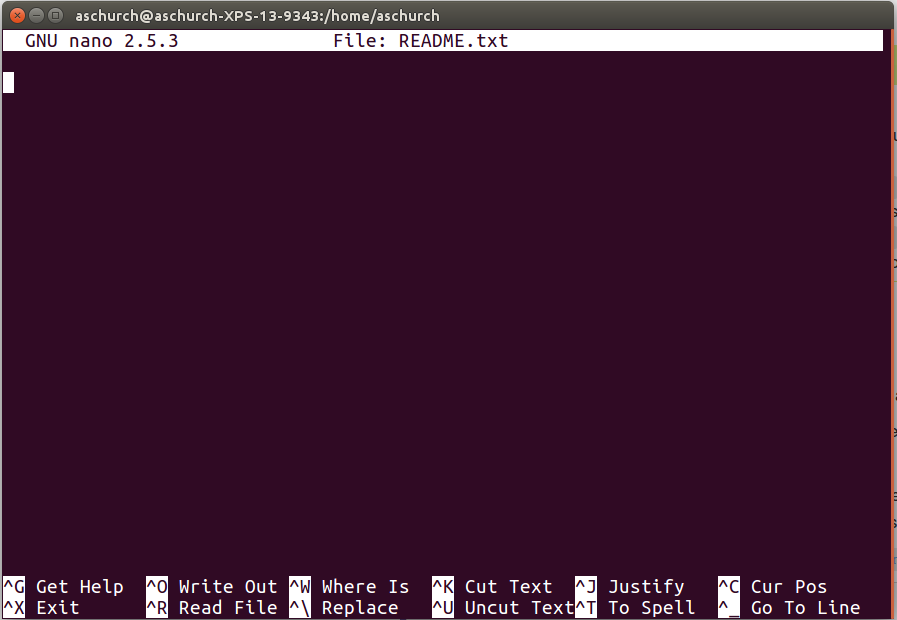
The text at the bottom of the screen shows the keyboard shortcuts for performing various tasks in nano. We will talk more about how to interpret this information soon.
Which Editor?
When we say, “
nanois a text editor,” we really do mean “text”: it can only work with plain character data, not tables, images, or any other human-friendly media. We use it in examples because it is one of the least complex text editors. However, because of this trait, it may not be powerful enough or flexible enough for the work you need to do after this workshop. On Unix systems (such as Linux and Mac OS X), many programmers use Emacs or Vim (both of which require more time to learn), or a graphical editor such as Gedit. On Windows, you may wish to use Notepad++. Windows also has a built-in editor callednotepadthat can be run from the command line in the same way asnanofor the purposes of this lesson.No matter what editor you use, you will need to know where it searches for and saves files. If you start it from the shell, it will (probably) use your current working directory as its default location. If you use your computer’s start menu, it may want to save files in your desktop or documents directory instead. You can change this by navigating to another directory the first time you “Save As…”
Let’s type in a few lines of text. Describe what the files in this
directory are or what you’ve been doing with them.
Once we’re happy with our text, we can press Ctrl-O (press the Ctrl or Control key and, while
holding it down, press the O key) to write our data to disk. You’ll be asked what file we want to save this to:
press Return to accept the suggested default of README.txt.
Once our file is saved, we can use Ctrl-X to quit the editor and return to the shell.
Control, Ctrl, or ^ Key
The Control key is also called the “Ctrl” key. There are various ways in which using the Control key may be described. For example, you may see an instruction to press the Ctrl key and, while holding it down, press the X key, described as any of:
Control-XControl+XCtrl-XCtrl+X^XC-xIn
nano, along the bottom of the screen you’ll see^G Get Help ^O WriteOut. This means that you can use Ctrl-G to get help and Ctrl-O to save your file.
Now you’ve written a file. You can take a look at it with less or cat, or open it up again and edit it with nano.
Exercise
Open
README.txtand add the date to the top of the file and save the file.Solution
Use
nano README.txtto open the file.
Add today’s date and then use Ctrl-X followed byyand Enter to save.
Writing scripts
A really powerful thing about the command line is that you can write scripts. Scripts let you save commands to run them and also lets you put multiple commands together. Though writing scripts may require an additional time investment initially, this can save you time as you run them repeatedly. Scripts can also address the challenge of reproducibility: if you need to repeat an analysis, you retain a record of your command history within the script.
One thing we will commonly want to do with sequencing results is pull out bad reads and write them to a file to see if we can figure out what’s going on with them. We’re going to look for reads with long sequences of N’s like we did before, but now we’re going to write a script, so we can run it each time we get new sequences, rather than type the code in by hand each time.
We’re going to create a new file to put this command in. We’ll call it bad-reads-script.sh. The sh isn’t required, but using that extension tells us that it’s a shell script.
nano bad-reads-script.sh
Bad reads have a lot of N’s, so we’re going to look for NNNNNNNNNN with grep. We want the whole FASTQ record, so we’re also going to get the one line above the sequence and the two lines below. We also want to look in all the files that end with .fastq, so we’re going to use the * wildcard.
grep -B1 -A2 -h NNNNNNNNNN *.fastq | grep -v '^--' > scripted_bad_reads.txt
Custom
grepcontrolWe introduced the
-voption in the previous episode, now we are using-hto “Suppress the prefixing of file names on output” according to the documentation shown byman grep.
Type your grep command into the file and save it as before. Be careful that you did not add the $ at the beginning of the line.
Now comes the neat part. We can run this script. Type:
bash bad-reads-script.sh
It will look like nothing happened, but now if you look at scripted_bad_reads.txt, you can see that there are now reads in the file.
Exercise
We want the script to tell us when it’s done.
- Open
bad-reads-script.shand add the lineecho "Script finished!"after thegrepcommand and save the file.- Run the updated script.
Solution
  bash bad-reads-script.sh
  Script finished!
Making the script into a program
We had to type bash because we needed to tell the computer what program to use to run this script. Instead, we can turn this script into its own program. We need to tell it that it’s a program by making it executable. We can do this by changing the file permissions. We talked about permissions in an earlier episode.
First, let’s look at the current permissions.
ls -l bad-reads-script.sh
-rw-rw-r-- 1 dcuser dcuser 0 Oct 25 21:46 bad-reads-script.sh
We see that it says -rw-r--r--. This shows that the file can be read by any user and written to by the file owner (you). We want to change these permissions so that the file can be executed as a program. We use the command chmod like we did earlier when we removed write permissions. Here we are adding (+) executable permissions (+x).
chmod +x bad-reads-script.sh
Now let’s look at the permissions again.
ls -l bad-reads-script.sh
-rwxrwxr-x 1 dcuser dcuser 0 Oct 25 21:46 bad-reads-script.sh
Now we see that it says -rwxr-xr-x. The x’s that are there now tell us we can run it as a program. So, let’s try it! We’ll need to put ./ at the beginning so the computer knows to look here in this directory for the program.
./bad-reads-script.sh
The script should run the same way as before, but now we’ve created our very own computer program!
You will learn more about writing scripts in a later lesson.
(OPTIONAL) Intermediate Content
If you are comfortable with the material in this lesson, feel free to explore Genomics Aotearoa’s Shell for Bioinformatics Workshop .
Key Points
The shell gives you the ability to work more efficiently by using keyboard commands rather than a GUI.
Useful commands for navigating your file system include:
ls,pwd, andcd.Tab completion can reduce errors from mistyping and make work more efficient in the shell.